Resin Art Materials & Supplies for Beginners: A Simple Guide
Resin art is an exciting medium for beginners, offering endless possibilities to create beautiful, glossy, and durable artwork. Whether you’re making coasters, jewellery, or larger projects, having the right materials is key to a successful start. Here’s an easy guide to help you get started with resin art.
*You can purchase our Readily available Kit for Resin raw materials for Beginners*
- Epoxy Resin.
Epoxy resin is the foundation of resin art. It’s made up of two parts: resin and hardener. When combined, they form a clear, strong finish.
- Choosing Resin: Look for a clear, non-yellowing epoxy resin that’s ideal for beginners. Many types are easy to work with, have minimal odour, and are designed to be bubble-free.
- Mixing Ratio: Most resins use simple ratios, such as 2:1 or 3:1. Following the instructions ensures great results.
- Mixing Supplies
You’ll need tools to mix resin and hardener properly.
- Measuring Cups: Use disposable or reusable silicone cups with clear measurements to get the perfect ratio.
- Mixing Sticks/Spatula: Wooden or silicone sticks work well for mixing, and slow stirring helps avoid bubbles.
- Measuring Scales: Better results can be obtained with the proper measurement of Resin & hardner as per the Mixing Ratio.
- Heat Gun or Torch
A heat gun or torch is essential for getting rid of bubbles after pouring the resin.
- Heat Gun: Use gentle heat to pop bubbles that rise to the surface.
- Blow Torch: A small butane torch can quickly eliminate bubbles, leaving a smooth finish.
- Isopropyl Alcohol/Bubble popping Spray: Using Isopropyl while working with Resin is an Easy & Effective Product to improve and give better results.
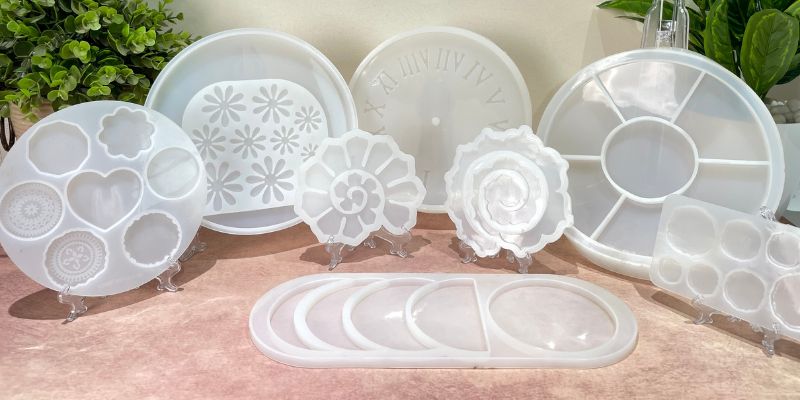
- Silicone Moulds
Silicone moulds are perfect for creating resin pieces like coasters, jewellery, Keychains, and other items.
- Pick Your Mould: Select flexible silicone moulds for easy removal once the resin has cured.
- Colour Pigments & Dyes
To add colour to your resin art, use resin-specific pigments and dyes.
- Pigments: Available in liquid or powder form, resin pigments give vibrant colours that mix smoothly.
- Mica Powders: For a shimmering effect, mica powders add sparkle to your creations.
- Alcohol Inks: Alcohol inks are ideal for colouring resin, as they evaporate quickly, leaving pigment without affecting the curing. It is preferred to use Alcohol based inks only to not impact the curing process.
- Protective Gear
Safety is important when working with resin, as it can be irritating to the skin and lungs.
- Gloves: Nitrile/latex gloves protect your hands from resin. Plastic Gloves can be used as well.
- Respirator Mask: Resins release fumes, so a mask is recommended to use do for safety as well as Heath in enclosed spaces.
- Apron: Wear an apron or old clothes to protect yourself from spills.
- Eyeglass: Eyeglass covers must be used for safety as we as Health purpose
- Workspace Protection
Cover your workspace with plastic sheets or wax paper to protect it from resin spills.
- Drop Cloths: Plastic or silicone mats make cleaning up easier and can be reused.
- Wax Paper: You can also use wax paper for an easy-to-clean surface.
- Sandpaper
After your resin has cured, sandpaper can help smooth rough edges or imperfections.
- Fine Grit: Use 400- to 600-grit sandpaper to carefully smooth any rough spots.
Sanding Machine: For an even smoother finish, Sanding machine works well with fine-grit sandpaper.
- Level Surface
Resin needs to cure on a flat surface to avoid uneven areas.
- Check for Level: Make sure your workspace is level to prevent resin from pooling in one area.
- Decorative Elements
You can embed objects in your resin to create unique effects.
- Dried Flowers: Use dried flowers, pressed flower sheets to add beauty and texture.
- Glitter or Stones: Add sparkle with glitter or small stones to give your artwork extra dimension.
- Miniature: Use of miniature liven up the Art piece giving it a Beautiful & Perfect touch related to Art.
--> Beginner Project: Resin Coasters
Start with a simple project like resin coasters.
- Step 1: Set up your workspace with protective gear and cover your surfaces.
- Step 2: Mix your epoxy resin and hardener according to the instructions.
- Step 3: Add pigments or mica powders to achieve your desired colour.
- Step 4: Pour the resin into silicone moulds.
- Step 5: Use a heat gun to pop any surface bubbles.
- Step 6: Let the resin cure for 24-48 hours on a flat, level surface.
- Step 7: Once cured, remove the coasters from the mould, and sand the edges if necessary.
Conclusion :-
Getting started with resin art is both fun and rewarding. With the right materials—like epoxy resin, pigments, moulds, and safety gear—you can easily create beautiful and functional pieces. As you gain confidence, experiment with different colours and techniques to take your resin art to the next level.


Guide to Embed Picture in Resin with helpful Tips & Techniques.
Start A Resin Business