So, you’ve decided to dip your toe into the world of resin artwork (welcome to the glossy side!). You may have scrolled past countless videos of people making shiny earrings, dreamy bookmarks, and tiny floral charms that look exactly like they came from a Pinterest board and said, “I could do that!”
But then… You find out there’s epoxy resin… and UV resin… and you're like, wait, there are types?
Don’t stress. You’re not alone, and today we’re zooming in on one of the easiest and fastest ways to dive into resin crafting: UV Resin. If you’re a beginner, impatient crafter, or just someone who hates long curing times (same), this one’s going to be your new fave.
This blog is your ultimate intro to what UV resin is, how it works, what you can use it for, and how not to mess it up. Let’s glow (literally).
What Exactly Is UV Resin?
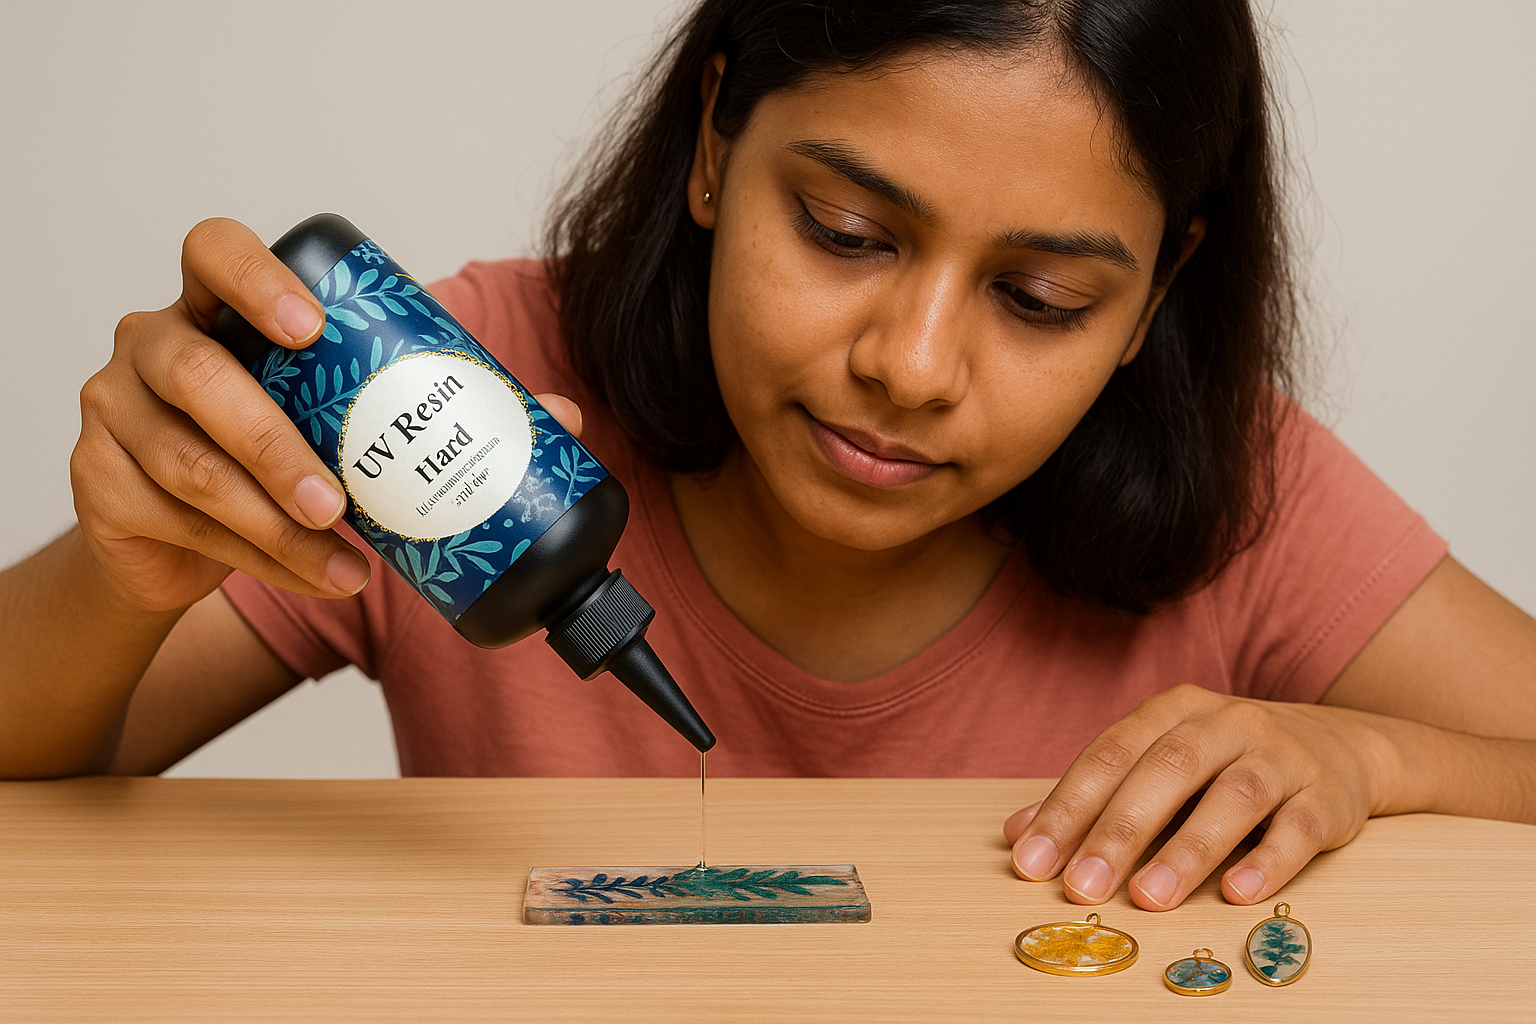
UV resin is a one-part resin that cures with exposure to ultraviolet light! Unlike epoxy resin (which needs two components and hours to cure), UV resin is ready to use straight from the bottle and can cure in just a few minutes under a UV lamp or sunlight.
It’s the drive-thru fast food version of resin crafting-but in a good way!
Why Use UV Resin?
Here’s what beginners (and impatient professionals) love about it:
-
Super Speed: No waiting 24 hours to see your project completed - just 2 - 4 under a UV lamp and you’re done.
-
No Mixing Mess: It’s a single-part system. Just open, pour, and cure.
-
Clear as Glass: Gives you a glossy glass-like finish that will enhance your project.
-
Perfect for Small Projects: Works well for jewellery, keychains, embellishments, and coatings.
-
Sunlight Cured: Don’t have a UV lamp. You can even cure your pieces from the sun (hello, DIYing outside!).
What You’ll Need to Get Started
Here’s your basic UV Resin starter pack:
-
UV Resin (obviously)
-
UV Lamp (36W or higher recommended, but sunlight works too)
-
Silicone Moulds or Metal Bezels
-
Decor Stuff like glitter, dried flowers, foil flakes, or pigments
-
Toothpicks or Mixing Tools
-
Nitrile Gloves + Mask + Good Ventilation (Safety first, always!)
How to Use UV Resin (Step by Step)
-
Set up your workspace – Cover your table, get your tools lined up, and play your favourite playlist.
-
Add decorations to your mould or bezel.
-
Pour UV Resin gently over your design (in thin layers if possible).
-
Pop any bubbles with a toothpick or a quick pass from a heat gun.
-
Cure it! Place under UV light for 2–4 mins (or 10–15 mins in strong sunlight).
-
De-mould & admire your genius. You made that. Go you.
Pro Tips to Keep You Winning
-
Always pour thin layers; it cures better and more evenly.
-
Too much pigment = curing issues. Keep it under control.
-
Wipe moulds with alcohol beforehand to prevent cloudy surfaces.
-
Store UV resin in a cool, dark place, it cures even through windows.
-
Sticky after curing? Cure it for 1–2 minutes more. Easy fix.
Avoid These Common Mistakes
|
Mistake |
What Went Wrong |
How to Fix It |
|
Cured but sticky |
Not enough UV exposure |
Cure longer or upgrade your lamp |
|
Yellowing |
Too much sun post-cure |
Store in a shaded area |
|
Doesn’t cure |
Wrong resin type (oops) |
Double-check you’re using UV resin |
|
Bubbles froze in place |
Didn’t pop them in time |
Use a toothpick or heat early on |
Final Thoughts: Resin, But Make It Instant
UV resin is kind of like that friend who always shows up on time, looks flawless, and never overcomplicates things. If you're looking to ease into resin art without the mess of mixing and marathon cure times, this is your go-to.
And here’s the best part: Tulsi Resin has a handpicked collection of high-quality UV resins, beginner-friendly kits, and tools that actually make your projects easier. Whether you’re making earrings for fun or planning to sell your crafts, they’ve got you covered.
So grab your UV lamp, prep your glitter, and let your ideas shine (literally). Resin art just got a whole lot easier and faster.
Which Resin Art Challenge Hits the Hardest and How to Overcome Them
Demoulding Disasters: Why Your Resin Moulds Tear and How to Prevent It?