هل سبق لك أن حدقت في ساعة حائط، أو سطح طاولة، أو صينية، أو قاعدة أكواب وتساءلت: "ما كمية الراتنج التي أحتاجها لهذا؟" سواء كنت تحلم بطاولة راتنج أنيقة، أو ساعة حائط رائعة، أو قاعدة أكواب لامعة، فالأمر واضح: اختيار الكمية المناسبة من الراتنج هو الأساس . التخمين ليس خيارًا عند العمل على مشاريع الراتنج، لأن القليل جدًا من الراتنج قد ينقص من مشروعك، والكثير منه مجرد إهدار للمال. لذا، دعونا نوضح الأمر: إليك طريقة مضمونة لتخطيط احتياجاتك من الراتنج باحتراف باستخدام حاسبة الراتنج!

قبل أن تبدأ
قبل استخدام الآلة الحاسبة، صفِّ ذهنك وقِس مشروعك بدقة. حدّد الطول والعرض والعرض (للأشكال المستطيلة/المربعة) أو القطر (للأشكال الدائرية) بالبوصة. تأكد من معرفة السُمك المطلوب، والذي يُقاس عادةً بالملليمتر (مم)، للحصول على نتائج دقيقة.
كيفية استخدام حاسبة راتنج تولسي
حاسبة الراتنج الإلكترونية من تولسي ريزين تُسهّل عليك عملية التخطيط . لا صيغ، لا متاعب، فقط نتائج دقيقة مُصممة خصيصًا لتلبية احتياجات مشروعك. سواءً كنت تُريد طلاء سطح مستوٍ أو صب قوالب مُعقدة، فهذه الأداة تُلبي جميع احتياجاتك.
الخطوة 1: حدد شكل مشروعك

-
ابدأ باختيار شكل مشروعك - مستطيل/مربع أو دائرة . سيحدد هذا طريقة قياس الأبعاد وحساب كمية الراتنج المطلوبة.
الخطوة 2: ما الذي تخطط للقيام به باستخدام راتنج تولسي والمصلب؟
تتطلب هذه الخطوة تحديد نوع مشروعك - طلاء أو صب:
-
الطلاء : يُستخدم الطلاء للطبقات الرقيقة المطبقة على الأسطح المستوية، مثل أسطح الطاولات والأعمال الفنية والصور الفوتوغرافية. يُضفي لمسة نهائية لامعة وواقية. يُعد هذا الطلاء مثاليًا للمشاريع التي تتطلب انتشارًا متساويًا للراتنج دون ملء عمق كبير. على سبيل المثال، يُنصح باستخدام الطلاء السفلي على أسطح الطاولات أو اللوحات القماشية التي تتطلب سمكًا يتراوح بين 1 و2 مم.

-
الصب : يتضمن الصب صب الراتنج في قوالب أو تجاويف سيليكونية لتشكيل أشكال أو ملء الفراغات. يُستخدم هذا في مشاريع الصب العميق، مثل طاولات الأنهار، وقوالب المجوهرات، والتماثيل الصغيرة المعقدة. يتطلب الصب كمية أكبر من الراتنج لملء الحجم، ويضمن ملء الفراغات بالتساوي دون فجوات هوائية.

الخطوة 3: اختر نسبة الراتينج والمصلب
تعتمد نسبة المصلب على احتياجات المعالجة الخاصة بمشروعك:
-
نسبة 2:1:

- سريع المعالجة، ذو قوام سميك لمنع التنقيط.
- يجف عند اللمس خلال 3-5 ساعات، ويتصلب بالكامل خلال 6-8 ساعات.
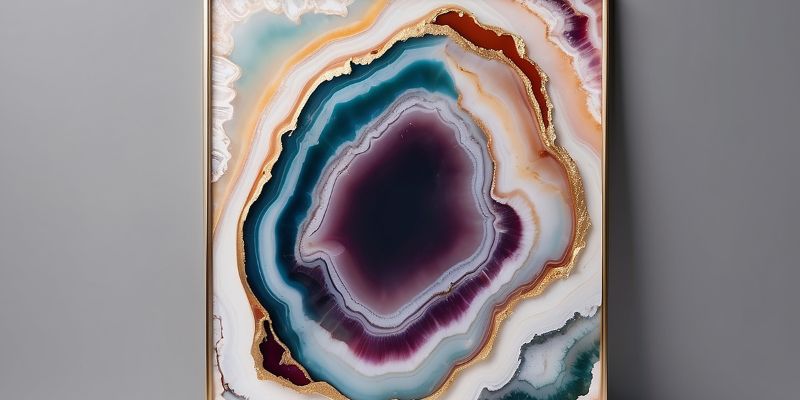
- الأفضل لأمواج المحيط، وقوالب المجوهرات، والألواح متوسطة الكثافة، والخشب، وفن الجيود.
- يوفر لمعانًا عاليًا مع شفافية واضحة للغاية.
- مناسب لصب قوالب بحجم يصل إلى 6 بوصات.
-
نسبة 3:1:

- معالجة أطول مع قوام رقيق للحصول على طبقات ناعمة.
- يجف عند اللمس خلال 8-12 ساعة، ويتصلب بالكامل خلال 24-36 ساعة.
- مثالية للصب العميق وقوالب السيليكون والطبقات العلوية.
- قادرة على صب طبقة واحدة بسمك 8-10 مم وصب بعمق 60 مم في 6-8 طبقات.
- يوفر طبقة نهائية غير قابلة للاصفرار وخالية من الرطوبة ومقاومة للتصلب.
الخطوة 4: قياس أبعاد مشروعك

الآن، وفقًا لمتطلبات مشاريع الطلاء أو الصب، تأكد من دقة قياسات الطول والعرض والعمق (للصب) أو السُمك (للطلاء). أدخل هذه الأبعاد في الآلة الحاسبة للحصول على متطلبات راتنج دقيقة تناسب مشروعك.
الخطوة 5: احصل على نتائجك

-
توفر الآلة الحاسبة:
-
إجمالي الراتنج المطلوب بالجرام أو الكيلوجرام.
-
انهيار الراتنج إلى المصلب .
-
التكلفة التقديرية لمشروعك.
يضمن لك هذا التفصيل الدقيق أن يكون لديك كل ما تحتاجه لبدء مشروع الراتينج الخاص بك دون شراء مبالغ زائدة أو نفادها في منتصف الطريق.
نصائح لحساب الراتنج للأشكال غير المنتظمة

بالنسبة للمشاريع التي تتضمن أشكالًا غير منتظمة، مثل القوالب الأبجدية أو التصاميم المجردة، قد يكون حساب متطلبات الراتنج أمرًا صعبًا. إليك بعض النصائح:
-
تقدير الحجم : قُرِّب حجم الشكل غير المنتظم بمقارنته بشكل هندسي قياسي. على سبيل المثال، قد يستهلك قالب أبجدي كمية راتنج أقل بنسبة ٢٠٪ من قالب مستطيل ذي أبعاد مماثلة.
-
مراعاة الاستخدام المُخفَّض : القوالب المُعقَّدة ذات المقاطع الرقيقة، مثل الحروف أو التصاميم المُفصَّلة، ستستخدم راتنجًا أقل بطبيعة الحال. عدّل حساباتك وفقًا لذلك.
-
الاختبار بالماء : إذا لم تكن متأكدًا، فاملأ القالب بالماء، وقم بقياس الحجم، واستخدم هذا كأساس لمتطلبات الراتينج الخاصة بك.
-
استخدم حاسبة راتنج تولسي : على الرغم من أن الحاسبة لا تحتوي على خيار الشكل غير المنتظم، يمكنك إدخال أبعاد قابلة للمقارنة (مثل المستطيل/المربع أو الدائرة) وضبط النتائج يدويًا.
نصائح أخيرة لاستخدام الراتنج بدقة

-
قم دائمًا بإعداد 10-15% إضافية من الراتنج للأشكال غير المستوية أو المواد المسامية مثل الخشب.
-
حافظ على درجة حرارة مكان العمل عند 25 درجة مئوية (77 درجة فهرنهايت) والرطوبة أقل من 50% لتجنب مشاكل المعالجة.
-
استخدم حاسبة راتنج تولسي للتخطيط الدقيق والخالي من المتاعب.
النتيجة: خطط بذكاء، واسكب بشكل مثالي
أعمال الراتينج الكبيرة مثيرة ومليئة بالتحديات. مع حاسبة راتنج تولسي ونصائح الخبراء، أنت جاهز لإنشاء روائع فنية مذهلة دون عناء الحسابات الخاطئة. توفر تولسي راتينج مواد عالية الجودة وأدوات وإرشادات لجعل مشاريع الراتينج الخاصة بك مثالية.
هل أنت مستعد لبدء مشروعك القادم؟ استكشف اليوم تشكيلة راتنجات تولسي ريزينز الفاخرة، وأطلق العنان لإبداعك!
اختيار مستلزمات الراتنج المناسبة: قائمة مرجعية شاملة للفنانين
إنشاء فن راتنجي خالٍ من الغبار: دليل خطوة بخطوة للمبتدئين والخبراء