لنكن واقعيين، فن الراتنج يبدو سهلاً على إنستغرام، أليس كذلك؟ سكب سلس، لمسات نهائية لامعة، وألوان حالمة. لكن عند سكبك الأول: فقاعات، لزوجة، ستُعيد النظر في خياراتك الحياتية.
لا تقلق، لستَ مُصابًا بلعنة. لقد خضتَ للتوّ أولى تحدياتك في فنّ الراتنج ، وصدقنا، جميعنا مررنا بذلك.
هذه المدونة هي حوارٌ مباشرٌ مع كل مبتدئٍ واجهَ شخصيًا أول تجربةٍ له في فنّ الراتنج. سنكشف عن أكثر الصعوبات شيوعًا، وأسبابها، وكيفية إصلاحها (فعليًا)، دون أي تزييف أو تزييف.
تحدي فن الراتنج
1. خلط الفوضى
اتبعتَ نسبةً تقريبية، والآن أصبحت قطعتك نصف ناعمة ونصف لزجة. جميلة.
الحل:
استخدم أكواب قياس مناسبة، واخلط بدقة حسب الحجم ، وليس حسب الاهتزازات. قلّب لمدة ثلاث دقائق على الأقل، مع كشط الجوانب والقاع. الراتنج ليس مكانًا للاختصارات.
2. مشكلة الفقاعات
سلسلة مفاتيحك الشفافة الآن تبدو كزجاجة صودا. شكرًا يا بابلز.
الحل:
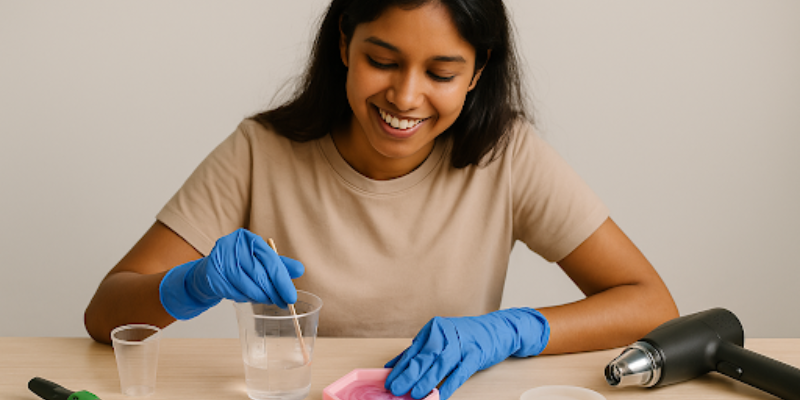
قلّب ببطء كما لو كنتَ تُقلّب عجينة الكيك. بعد الصب، استخدم مسدسًا حراريًا أو شعلة يدوية لتفجير تلك المخلوقات الصغيرة المزعجة قبل أن تشعر بالراحة.
3. دراما الغبار
انتهيتَ من قطعتك. إنها مثالية. ثم سقط شعرٌ غريب أو ذرة غبار في المنتصف أثناء المعالجة.
الحل:
امسح مساحة عملك، وغطِّ مشروعك بصندوق بلاستيكي. نصيحة احترافية: لا تتنفس بقوة فوق القالب، فالراتنج تافهٌ جدًا.
4. مأساة الصينية المائلة
صببتَ على سطحٍ بدا مستويًا. بعد ساعات... تَوَسَّلَ الراتينج إلى إحدى زواياه كما لو كان يحاول الهرب.
الحل:
استخدم أداة تسوية (نعم، إنها أداة). يجب أن يكون سطحك مستويًا بالفعل ، وليس "يبدو مستويًا بما يكفي".
5. نوبات الغضب المرتبطة بارتفاع درجة الحرارة
بارد جدًا = راتنجك يرفض التصلب. ساخن جدًا = تشققات، اصفرار، أو ذوبان كامل (حرفيًا).
الحل:
حافظ على درجة حرارة الغرفة بين ٢١ و٢٤ درجة مئوية (٧٠-٧٥ درجة فهرنهايت). استخدم السخانات في الشتاء، والمراوح في الصيف، وتجنب أشعة الشمس المباشرة.
6. الإفراط في استخدام الصبغة
أردتَ لونًا جريئًا، فأضفتَ نصف الزجاجة. الآن، لن يجفّ، أو لا يزال لزجًا. عفوًا.
الحل:
حافظ على نسبة أصباغ أقل من ٦٪ من إجمالي حجم الراتنج. الأقل هو الأفضل. ثق بنا.
7. متلازمة الأيدي غير الصبورة
لقد وخزتَ قالبك قبل أن يجف تمامًا، أليس كذلك؟ الآن، هناك بصمة خالدة في أفعوانية كوبك.
الحل:
اتركه وشأنه. تختلف مدة المعالجة باختلاف العلامة التجارية، ولكن كلما طالت مدة الانتظار، كانت النتيجة أفضل. لا تلمسه حتى يصبح صلبًا كالصخر.
8. فوضى العفن
تمزق قالبك أو ترك قطعتك غائمة. استخدمت قالبًا رخيصًا من متجر مشبوه، أليس كذلك؟
الحل:
استثمر في قوالب سيليكون عالية الجودة . ثق بنا، لدى تولسي ريزن قوالب رائعة. وإذا لزم الأمر، استخدم القليل من بخاخ فك القالب لإزالة القالب بشكل نظيف.
9. زلات السلامة
دخلتَ بلا كمامةٍ وبيديك. الآن يداك لزجتان ورأسك يؤلمك.
الحل:
ارتدِ القفازات، وافتح النوافذ، واستعد لاستخدام الكمامة، خاصةً إذا كنت تعمل بكميات كبيرة. الراتنج فنٌّ، ولكنه أيضًا علم. احترم المواد الكيميائية.
10. مشاكل الأدوات
أنت تخلط الراتنج بملعقة من مطبخك. من فضلك... لا تفعل!
الحل:
احصل على الأدوات المناسبة: أعواد خلط، أكواب قابلة لإعادة الاستخدام، ملاعق مسطحة، ومسدس حراري. تأتي مجموعات الأدوات الأولية من تولسي ريزن مزودة بكل ما تحتاجه لتجنّب أي صعوبة.
أنت لا تفشل، أنت فقط تبدأ
كل فنان راتنج مرّ بهذه التجربة، من تعكر، وتشوّه، وانهيار "لماذا لا يزال لزجًا؟". أنت لا تخطئ، أنت فقط تتعلم.
الفرق بين "آه، لقد استسلمت" و"هذا هو شغفي الجديد" هو معرفة ما يجب توقعه وكيفية تجاوز الأخطاء . استمر. استمر في العطاء. استمر في الضحك عندما تصبح الأمور غريبة (لأنها ستحدث).
وإذا كنت بحاجة إلى مجموعات راتنج مناسبة للمبتدئين، وقوالب أنيقة، وأدوات عملية لا تشوبها شائبة أثناء العمل، فجرب Tulsi Resin . فهم يوفرون لك كل ما تحتاجه، بما في ذلك الفقاعات، وكل ما يلزم.
منتج من روثا ميسرا
راتنج الأشعة فوق البنفسجية: ما هو وكيفية استخدامه في مشاريعك المنزلية