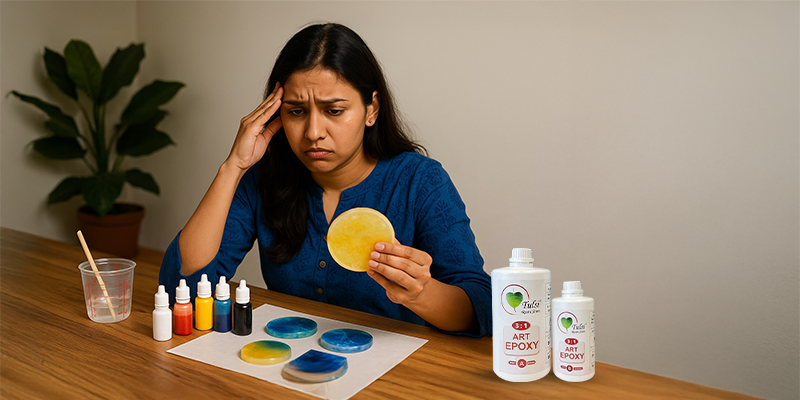
اخترتِ اللون المثالي. خلطتِه بعناية فائقة. سكبتِه باحترافية. ثم... انقلبت الأمور رأسًا على عقب. يبدو اللون مختلفًا تمامًا بعد أن جف. يبدو الوردي خوخيًا بعض الشيء، والأزرق الداكن يُشعرك وكأنك غطست تحت الماء، أما الأبيض؟ حسنًا، إنه الآن قريب بعيد للون الأبيض المائل للصفرة.
إذا سبق لك أن صرخت "لا يوجد شيء مستحيل!" بعد صب الراتنج، مرحبًا بك في واحدة من أكثر مفسدات المزاج شهرة في فن الراتنج.
فلنبدأ بفك شفرة الدراما: هل تتغير الألوان بعد صب الراتينج؟ الجواب هو نعم، ولكن يمكنك التحكم به.
لماذا تتغير الألوان بعد صب الراتينج؟
هناك بعض الأسباب الحقيقية وراء قيام ألوانك بهذه الحركة الماكرة بعد المعالجة:
1. كيمياء الراتنج نفسها
الراتنج شفاف ولامع كالكريستال. عند إضافة الصبغة، تؤثر الشفافية على كيفية انعكاس اللون للضوء. قد يتحول اللون العنابي الداكن الجميل الذي مزجته إلى لون توت العليق الأفتح بعد سكبه وتجفيفه. باختصار، يُخدعك الراتنج بصريًا.
2. عامل السُمك
الطبقات الرقيقة أم الطبقات السميكة؟ قصتان مختلفتان تمامًا. تسمح الصبَّات الرقيقة بمرور المزيد من الضوء، مما يجعل اللون يبدو أفتح أو حتى شفافًا. أما في الصبَّات السميكة، فيزداد اللون عمقًا مع تراكمه.
3. الاصفرار مع مرور الوقت
خاصةً مع الراتنجات منخفضة الجودة، قد يُسبب التعرض للأشعة فوق البنفسجية اصفرارًا. وهذا بالطبع يُفسد الألوان الفاتحة والمحايدة. هل نسي المرء ذلك اللون الأبيض الحليبي الذي أحبه؟ قد يبدأ بمظهر يشبه حليب الهالدي بعد بضعة أسابيع.
4. حيل نوع الصبغة
تختلف تفاعلات الأصباغ. فأحبار الكحول، ومساحيق الميكا، والأصباغ السائلة تتفاعل مع الراتنج بشكل مختلف. بعضها يطفو، وبعضها يغرق، وبعضها الآخر يصبح شديد التماسك بعد التصلب.
5. الدراما الحرارية أثناء المعالجة
قد تُغيّر الحرارة العالية أثناء المعالجة طريقة ترسب الأصباغ وتصلبها بشكل طفيف. كما قد تُغيّر الحرارة الزائدة بعض الألوان أو تُغمّقها.
كيفية الحفاظ على دقة الألوان: الحيل الحقيقية
الآن بعد أن كشفنا عن الجناة، إليك كيفية التفوق عليهم بذكاء مثل النينجا الراتنجي الحقيقي:
1. قم دائمًا بإجراء اختبار صب صغير أولًا.
قبل أن تُكملي الكمية النهائية من القطعة، اسكبي عينة صغيرة. سيساعدكِ ذلك على تقييم مظهر اللون بعد التصلب.
2. فكر في الشفافية.
إذا كنت تستخدم بقعًا معتمة، فاستخدم أصباغًا معتمة . ستمنحك الأصباغ الشفافة أو شبه الشفافة مظهرًا أكثر شفافيةً ما لم تُضف طبقات سميكة منها.
3. فهم أصباغك
-
تعطي مساحيق الميكا وهجًا ولكنها قد تبدو فاتحة في طبقات رقيقة.
-
يمكن أن تتغير أحبار الكحول بشكل كبير اعتمادًا على الانتشار.
-
ستعطي الصبغات السائلة تشبعًا ثابتًا، ولكنها ستصبح داكنة أيضًا بمرور الوقت.
4. لا تبخل بجودة الراتينج الخاص بك.
تعتبر الراتنجات عالية الجودة والمقاومة للأشعة فوق البنفسجية تستحق المال لأنها تدوم لفترة أطول وتقاوم الاصفرار وتوفر الوضوح، وهو أمر مهم للاحتفاظ باللون.
5. اخلط ببطء، اخلط جيدًا
الخلط القوي يُنتج فقاعات، تُشوّه اللون والنقاء. الخلط البطيء والمستمر يُتيح توزيعًا متساويًا للصبغة.
6. شاهد مباراة هيت
لا تُبالغ في استخدام مسدسات الحرارة أو درجات حرارة المعالجة. فالحرارة الزائدة قد تُفسد قوام الصبغة والراتنج.
7. اسمح بالمعالجة الكاملة قبل الحكم
تستمر ألوان الراتنج في التغير قليلاً أثناء جفافها التام. ما يبدو مختلفًا بعد 6 ساعات قد يستقر تمامًا بعد 24-48 ساعة.
النتيجة: لعبة الألوان قابلة للفوز تمامًا
نعم، الراتنج غير متوقع بعض الشيء. يُبقيك متيقظًا. لكن بمجرد فهمك لخصائص لونه، ستتعلم كيفية التحكم في النتيجة باحترافية. تخيّل الأمر كتحضير البرياني، حيث تختلف التوابل أثناء الطهي، لكن الخبرة تُساعدك على إتقانها في كل مرة.
وإن كنت تبحث عن أصباغ وراتنجات وأدوات ولوازم تساعدك على الفوز في معركة الألوان، فهذا هو بالضبط ما تقدمه تولسي ريسين .
سكب سعيد. أتمنى أن تبقى ألوانك كما حلمت بها تمامًا.


كوارث إزالة القالب: لماذا يتمزق قالب الراتينج الخاص بك وكيفية منع ذلك؟
10 أشكال فنية يمكنك تجربتها على قواعد MDF الخاصة بنا: من تنقيط الماندالا إلى النقش، استكشف كل الاحتمالات